

How To Change A Headlight Bulb On A 2013 Chrysler 200
Chrysler 200 Headlight Bulbs Replacement Guide
How to change a depression/high beam, plough indicate and side mark light bulbs in the headlights of a 2011-2014 Chrysler 200.
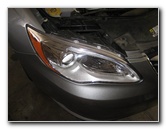
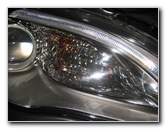
2013 Chrysler 200 Headlight
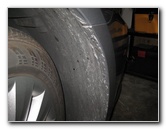
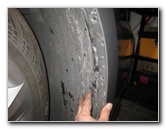
Plough Front Wheels
Wheel Well Liner Fastener
Owners of other Chrysler, Dodge, Jeep or RAM vehicles such every bit the Avenger, 300, Town & Country, Challenger, Charger, Sprint, Durango, Journey, Grand Caravan, Patriot, Wrangler, Grand Cherokee, Compass, 1500, 2500, 3500, C/5 Tradesman and ProMaster may besides detect these DIY instructions to be helpful.
Replacement bulbs with their part numbers are as follows: Low/High Axle # 9012 (A.K.A. "HIR2"), Front end Turn Bespeak # 3157A (also 3157NA or 3157NAK) and Forepart Side Marker Light Bulb # 2825 (also 168 or W5W).
To access the Low/High beam headlight bulb or side marker bulb, you'll need a 7mm socket with a 1/iv" drive ratchet and a flathead screwdriver.
No tools are needed to supplant the front plough signal light bulbs.
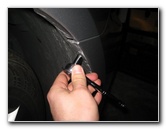
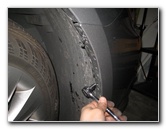
Remove 2d 7mm Spiral
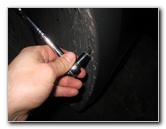
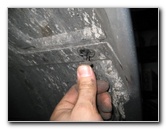
Pry Out Center of Pop Rivet

Remove Plastic Fastener
Remove the two screws well-nigh the outer edge of the black plastic bike well liner by turning them counterclockwise with the 7mm socket and 1/4" drive ratcheting wrench.
Set the two screws bated in a safe identify.
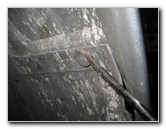
Pry out the center part of the black plastic pop rivet fastener located further inward on the cycle well liner with a flathead screwdriver. And so pull out the remainder of the fastener.
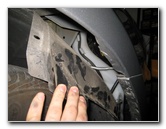
Pull Back Wheel Well Liner

Twist Off Plastic Dust Cap
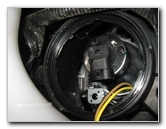
Low/High Beam Bulb
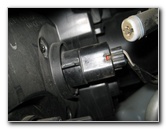
Rotate the round black plastic grit cover counterclockwise before removing information technology to expose the low/high beam seedling.
1/4 Turn Counterclockwise
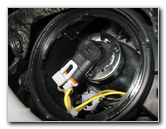
Disconnect Ability Plug
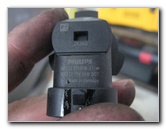
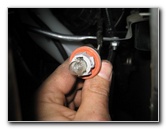
Philips 12V 55W # 9012
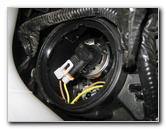
Pry upwards the retaining clip on the light grey electrical connector before pulling the plug direct off the base of the erstwhile bulb.
Electrical Connector
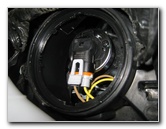
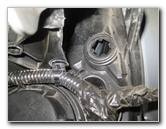
Empty Bulb Socket
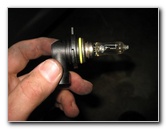
Insert New # 9012 Bulb
If you do get the new seedling dirty, wipe it clean with an alcohol moistened paper towel.
Insert a new # 9012 headlight bulb in to the housing and rotate it 1/4 turn clockwise to secure it in place.
1/4 Plough Clockwise - Lock
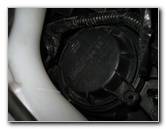
Replace Plastic Dust Cover
Front Side Marking Socket
Replace the round blackness plastic dust cover by twisting it on in the clockwise direction.
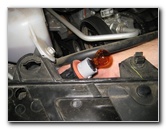
The front side marker bulb socket is located merely above the headlight seedling and closer to the outer edge of the assembly.
1/4 Turn Counterclockwise
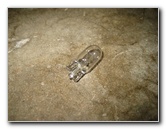
Old # 2825 Light Bulb
Side Marker Light Housing
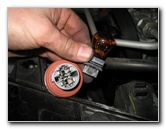
Pull the old bulb straight out of the socket and push button in a new # 2825 bulb.
If necessary, you may also be able to use any other miniature wedge base bulbs such every bit the # 168, W5W, 158, 194 or a compatible LED unit.
one/4 Plow Clockwise - Lock
Supersede Cycle Splash Baby-sit
Tighten Two 7mm Screws
Push the plastic wheel well liner back in to place.
Supersede the two screws along the outer edge of the wheel well liner and tighten them in the clockwise direction with the 7mm socket and ratcheting wrench.
Button In Plastic Fastener
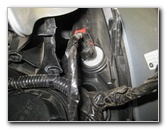
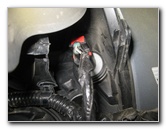
Front Turn Signal Light Bulb
1/4 Turn Counterclockwise
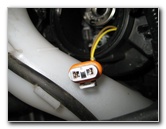
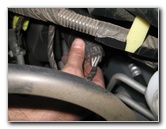
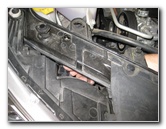
To replace the front plow indicate light bulb, just reach in behind the headlight associates to access the black plastic socket.
Turn Point Bulb Socket
Remove Bulb Socket
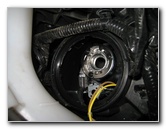
Pull Out Former # 3157A Bulb
Pull the former bulb direct out of the socket and push in a new amber colored # 3157A. You lot may besides use a # 3157NA or 3157NAK bulb.
ane/4 Turn Clockwise - Lock
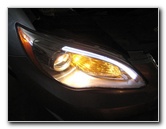
Test New Headlight Bulbs
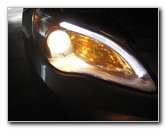
Testing High Beam
Test the new bulbs by turning on the headlights, activating the adventure signals and flashing the loftier beams.
Be sure to record the bulb change in your vehicle's service records.
For more than, check out my other Chrysler 200 DIY Maintenance & Repair Guides.

Source: https://www.paulstravelpictures.com/Chrysler-200-Headlight-Bulbs-Replacement-Guide/
Posted by: grillothiseatchat.blogspot.com
0 Response to "How To Change A Headlight Bulb On A 2013 Chrysler 200"
Post a Comment